How to Use Thinning Shears on hair in 8 Steps
By adhering to these instructions, you’ll achieve your desired outcome minus the potential complications that come from improper use of thinning shears.
Thinning Shears – An Overview
Thinning shears appear similar to scissors, yet they feature a blade with 28 to 40 sharp teeth, while the opposite blade is smooth. These precise grooves enable hair retention as selected strands are trimmed from the teeth. Thinning shears guarantee uniform trimming, preventing an uneven or jagged appearance. Moreover, they effectively eliminate excess volume and heaviness from dense hair, preserving its original shape and style. This exemplifies how to use thinning shears on hair effectively.
Step-by-step guide on how to use thinning shears on hair
Step 1: Use on Dry Hair
 Optimal results are achieved when thinning shears are employed on dry hair. This approach offers instant insight into each cut’s outcome, unlike using them on wet hair, which conceals the eventual style until drying is complete. Thinning wet or damp hair increases the chance of excessive thinning and an undesirable final cut.
Step 2: Untangle Hair
Before thinning, comb your hair to remove knots. A fine-tooth comb works best to ensure smooth strands for a perfect cut.
Step 3: Separate Areas of Hair
 Utilize a hair clip to divide your hair into smaller sections for easier thinning. To ensure uniformity, address each section separately, promoting a well-balanced cut. This technique also aids in tracking which areas you’ve treated with thinning shears, preventing potential overuse and future issues.
Step 4: Start With Small Sections
Grasp one-inch segments of your desired area using two fingers, holding the thinning shears in your opposite hand. Avoid taking excessive hair, which can result in an uneven look. Managing smaller sections as you work through your hair using the thinning shears enhances control and prevents over-thinning, ensuring a balanced outcome.
Step 5: Begin Cutting Near the Ends
To begin how to use thinning shears on hair, start about an inch above your hair ends. Depending on your hair’s length and how much thinning you want, you can work your way upward along the hair shaft. For longer hair, go up an inch at a time to remove extra bulk and thin more areas. Remember, avoid the crown area. Don’t thin too close to the root or the halo part of your head. While thinning there might temporarily reduce volume, it can lead to problems as the hair grows. Thinning near the root creates more volume and takes time for the cut strands to blend with the rest of your hair. To achieve manageable, thinner hair, focus on thinning closer to the ends and stay away from the crown.
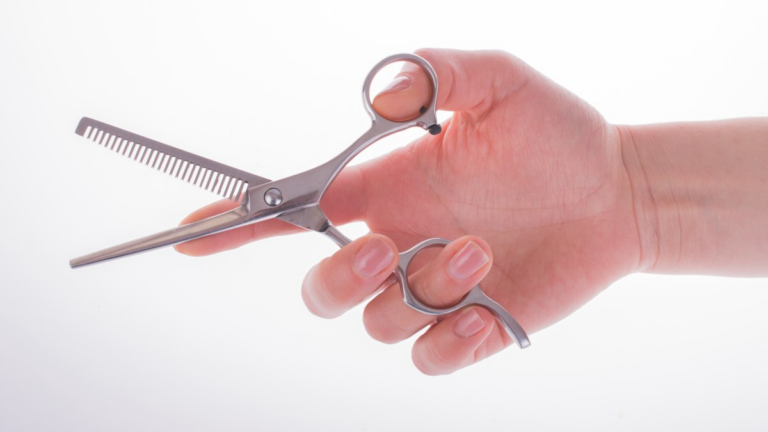
Step 6: Angle the Thinning Shears
Thinning shears aren’t meant for a straightforward trim. These tools complement regular scissors, enhancing your haircut by blending hair ends seamlessly and avoiding a harsh edge. For a soft, well-integrated appearance, hold the shears at an angle, either pointing downward toward the floor or upward towards the crown. This technique guarantees a naturally elegant and sleek finish, exemplifying the process of how to use thinning shears on hair effectively.
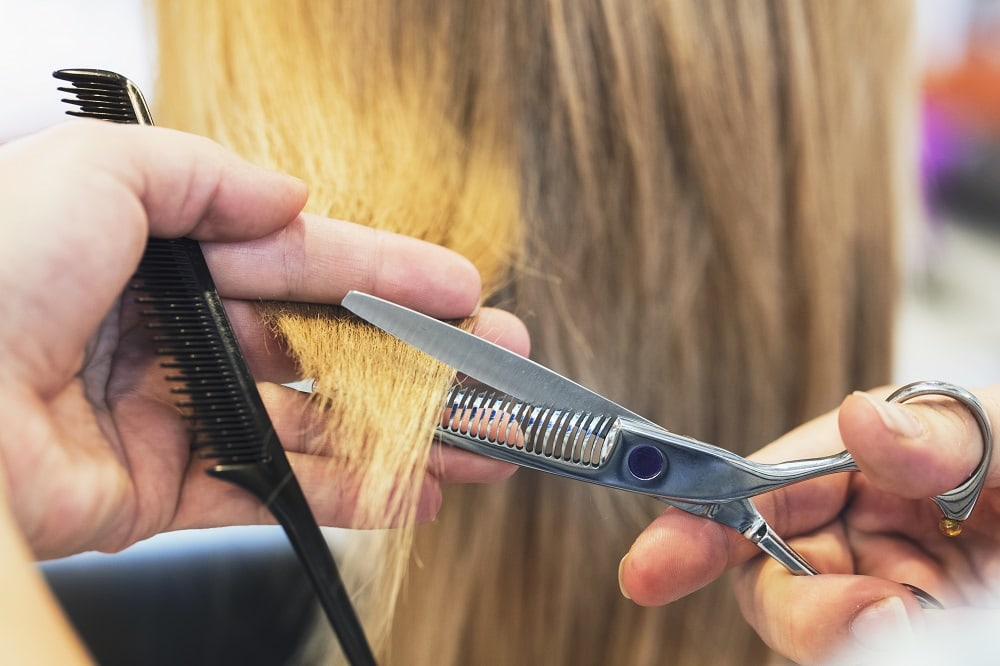
Step 7: Trim and Slide Along the Hair
Begin with a single cut, smoothly gliding the closed shears down to the hair ends to achieve immediate thinning. Feel free to repeat this action in the same area if further thinning is desired, but pause after each cut to evaluate the hair’s natural placement. To achieve a more subtle thinning effect, keep the shears open, gently scrape the hair strands at an angle, and then glide downward. This approach trims less hair compared to closing the blades, providing controlled thinning. Keep your shears sharp.
Step 8: Proceed with the Rest of Your Hair Sections
Continue thinning your hair by working through the remaining sections. Avoid excessive use, as over-thinning may not yield desired results. While you can revisit sections for additional cuts, remember that once hair is removed, it can’t be undone.